
Pet-Safe Charms: The Leash-Grab Test You Didn’t Think About
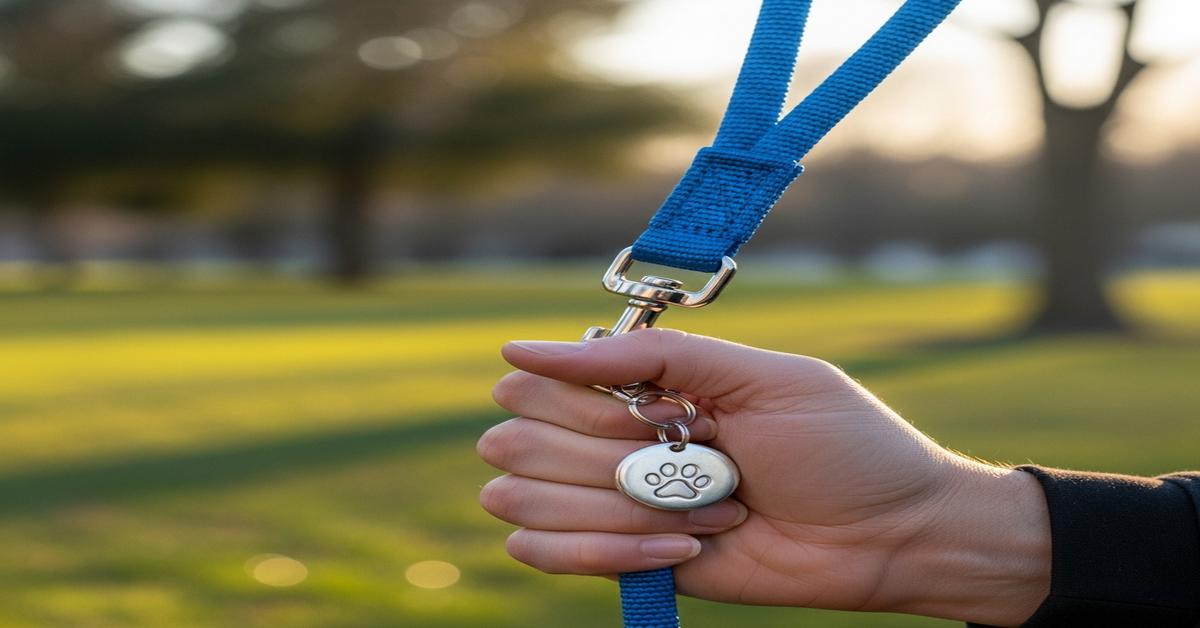
Charms and dangling ID tags look cute on collars. But they can become a hazard when a hand, leash, branch or grate snags them. The simple test most people skip is the *leash-grab test* — a quick tug and inspection that predicts whether a charm will hold, shear off, or create a worse snag. Below I explain exactly how to run that test at home or in the studio, what to look for in materials and hardware, and design choices that reduce risk for cats and dogs.
Why the leash-grab test matters
A charm can fail in two dangerous ways: it can detach and be swallowed, or it can act as a catch-point that traps the animal. The leash-grab test reveals both problems. It checks whether the connection points (split rings, jump rings, rivets) will fail under realistic forces and whether edges or shapes will hook on fingers, leashes, railings, or vegetation. Doing this test before a charm ever goes on a pet reduces entanglement, ingestion, and neck-injury risks.
How to perform the leash-grab test — step by step
- Visual check first. Look for thin wire, open jump rings, sharp edges, and long dangles that could loop. If you see a barely closed jump ring or brittle plating, stop and fix it before continuing.
- Attach the charm where it will be worn. Put it on the collar or harness D-ring exactly as an owner would. If the charm will clip to a leash ring, attach it there.
- Hand tug test. Pull the charm in multiple directions: down, up, rotated 90°, and across (toward the pet’s back). Use steady force first, then a stronger jolt to simulate a snag. You should feel if a ring slides open, a solder breaks, or a jump ring twists.
- Measured pull (optional). If you want numbers, use a small luggage or fishing scale and pull until the connection fails. Record the force and compare to recommended limits (see guidance below).
- Observe failure mode. If the charm detaches cleanly from a designed breakaway point, that’s preferable to breaking into sharp fragments. If a ring opens and the charm falls off intact, it may be recoverable. If plating flakes or the charm shatters, redesign.
What to inspect: hardware, rings, and fastenings
Most failures happen at the rings and attachments. Here’s what to examine and why it matters.
- Jump rings vs split rings. Open jump rings (soldered or not) are common. A poorly soldered jump ring can shear open. Split rings are more secure because the wire coils around twice like a tiny key ring. Use split rings with a wire diameter of about 0.9–1.2 mm (18–16 gauge) for medium durability. Thinner than 0.8 mm risks opening under load; thicker adds weight.
- Solder and weld quality. Soldered jump rings should show full, continuous solder all around. For steel or titanium work, spot or laser welding gives a stronger, smoother finish and prevents opening under torsion.
- Crimps and rivets. Look for proper crimp collar compression and head formation on rivets. A crushed, brittle crimp will fail when pulled at an angle.
- Clasps and clips. Small lobster or spring rings are fine on a keychain, but on a pet collar they can pinch or open under side-load. Avoid tiny spring-ring connectors on collars for cats and small dogs.
Design and size guidelines (practical numbers)
Choose charm size and weight based on the animal’s size and activity. Heavier or long charms increase snagging risk.
- Weight targets. For cats and very small dogs (up to ~4 kg), keep charm weight under 3–4 g. For small dogs (4–10 kg), keep under 7 g. For medium dogs (10–25 kg), under 12–15 g. These are practical targets — the lighter the charm, the less force created during a snag.
- Profile and edges. Favor flat silhouettes (tags 15–25 mm across) rather than long dangly shapes. Round or oval tags won’t hook as easily as angular charms with points. Smooth all edges to a radius so skin or collar material can slide off instead of catching.
- Attachment length. Short attachments reduce leverage. Keep the distance from the charm to the collar under 8–10 mm where possible.
- Breakaway vs permanent. For cats, use breakaway collars and consider charms that clip to a breakaway loop. For dogs, design for durability but make sure the connection fails cleanly (charm detaches) rather than opening into sharp fragments.
Materials and allergy/toxicity notes
What the charm is made of affects safety and durability.
- Safe metals. Surgical stainless steel (316L) and titanium are strong and hypoallergenic. 14k gold is durable and safe; 18k is softer and dents more easily. Sterling silver is fine but tarnishes and can flake plating if gold-plated thinly.
- Plating and thickness. If using gold or other plating over base metals, keep plating thickness robust — aim for at least 2.5 microns for gold vermeil to reduce early wear. Thin plating can flake and create small sharp flakes a pet could ingest.
- Avoid toxic alloys. Do not use lead, cadmium, or high-nickel alloys for pet wear. These metals can be toxic if chewed and cause dermatitis on sensitive animals.
- Soft materials. Silicone or embroidered cloth tags are lightweight and low-catch; they’re a good alternative for active cats and small dogs.
Care, inspection, and owner guidance
Even the best charm needs regular checks. Tell owners to:
- Inspect rings and solder points weekly for gaps or deformation.
- Remove charms during rough play, grooming, or crate time for highly active or chewing pets.
- Replace any hardware that shows plating loss, cracks, or burrs. Small changes in ring shape often foreshadow failure.
- Clean with mild soap and a soft brush; avoid aggressive chemicals that strip plating.
Recommendations for designers and makers
If you make pet charms, build safety into the piece.
- Use welded or laser-welded connections whenever possible.
- Specify split ring wire diameter and inner diameter on the component spec sheet (e.g., 1.0 mm wire, 6 mm ID for small tags).
- Design flush-set or low-profile attachments. Minimize protrusions and jagged forms.
- Include a simple leash-grab test in your quality control: attach, tug in four directions, and record whether the charm detaches or the attachment deforms.
- Label items with weight and recommended pet size. That helps owners choose safely without guessing.
The leash-grab test is fast, low-tech, and revealing. It shows where a piece will fail and whether that failure mode is acceptable. Do it before the charm goes on a pet — and teach owners to do a quick check anytime a pet’s collar looks different. That small step prevents a lot of preventable injuries and lost charms.