Blog
Prong Check 101: The Toothpick Test That Saves Your Center Stone
A loose prong is the most common reason people lose a center stone. The good news: you can catch most problems at home with one simple tool — a wooden toothpick. This article shows exactly how to perform the “Toothpick Test,” what to look for, why prongs fail, and what to do if a prong is worn or broken. I use plain language, numbers, and practical examples so you can protect a 0.25 ct delicate stone or a 3 ct showpiece.
Why check prongs at home
Prongs hold the stone in place. They take every knock, knock-off, and cleaning. Over time the metal thins or bends. Heat from resizing, hard impacts, even ordinary wear can change a prong’s shape by fractions of a millimeter. That small change can allow the girdle of the stone to shift. If you do a quick check every few weeks you’ll catch problems while repair is inexpensive.
What breaks and why
- Metal wear and flow: Gold alloys (14k = 58.3% Au; 18k = 75% Au) are softer than platinum (typically 95% Pt in jewelry). A 14k prong with a 0.9–1.2 mm cross-section will wear faster than a 1.2–1.6 mm platinum prong. Metal can thin to 0.3–0.5 mm at the tip, then crack.
- Mechanical fatigue: Repeated flexing causes microscopic cracks. A prong might look fine but fail after one hard bump.
- Resizing and repair: Heat and soldering change metal hardness. Resized rings often show weak spots at the joint or nearby prongs.
- Impact: A single hit can bend or flatten a prong, creating a gap between the tip and the stone.
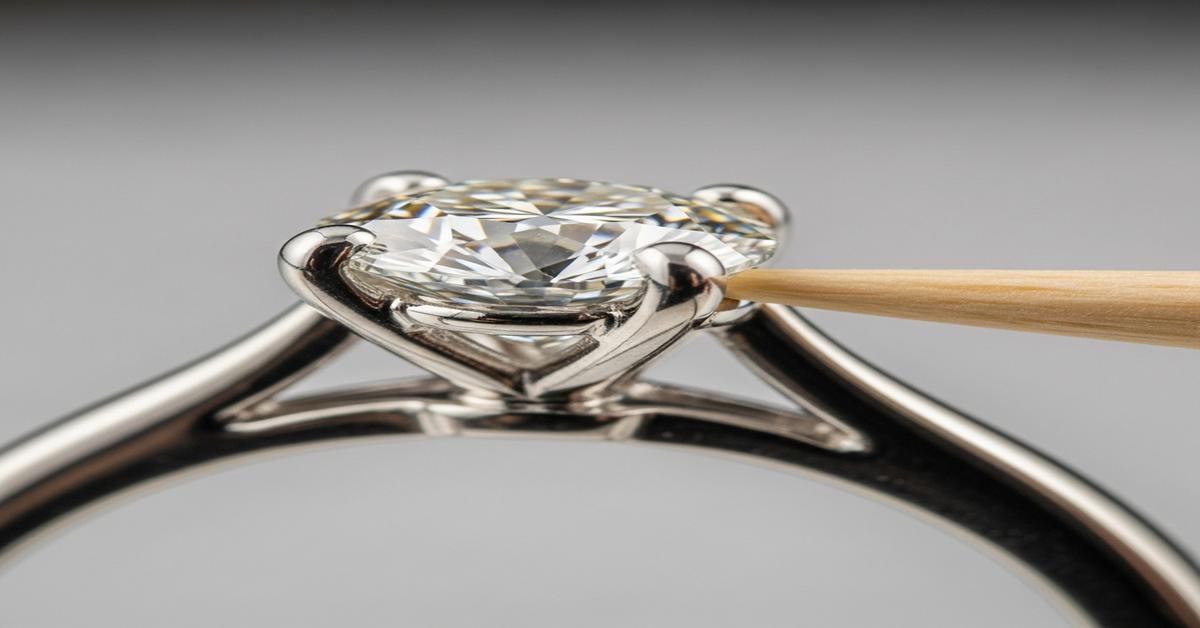
The Toothpick Test — step by step
Use a plain wooden toothpick or an orange stick. Don’t use metal tools. Metal can nick the stone or prong and gives a false sense of “tightness.”
- Step 1 — Good light and a steady hand: Sit by a lamp. Hold the ring between thumb and index finger so the stone faces you. Keep the ring stable.
- Step 2 — Visual first: Look for gaps between the prong tip and the stone’s girdle. Also look for flattened or discolored prong tips. Use a 10x loupe if you have one.
- Step 3 — Slide test: Place the point of the toothpick under the edge of each prong, one at a time, and gently push toward the stone. You are not trying to move the stone; you are checking for any noticeable flex or give. If the prong moves more than a hair’s width (about 0.1–0.2 mm), it’s loose.
- Step 4 — Gap probe: Slip the toothpick between the prong tip and the stone’s girdle. If it slides in easily or you can feel a clearance, the prong isn’t gripping. A well-set prong typically blocks the toothpick or allows only a very tight scrape.
- Step 5 — Check under the head: Angle the ring and check for cracks at the base of prongs or the gallery. Use the toothpick to feel for rough edges or hairline splits where prong meets crown.
- Step 6 — Repeat all around the stone: Check every prong and also the mount on the opposite side if there are multiple stones.
What counts as “loose”
If any prong moves when nudged, shows an obvious gap, or has a blunt/flattened tip, treat it as loose. Don’t assume a six-prong setting reduces risk — if one prong fails, the stone can shift and then wear the neighboring prongs faster. Even a 0.2 mm gap is enough for grit to wedge and enlarge the space.
Immediate actions if a prong fails the test
- Stop wearing the ring. Continued wear risks the stone falling out.
- Photograph the ring. Take clear photos from multiple angles. This helps a jeweler and your insurance claim if needed.
- Avoid ultrasonic cleaners: Ultrasonic baths can dislodge a stone from a weakened prong.
- Visit a reputable jeweler: Ask for a hands-on inspection and an estimate for re-tipping or repair.
What a jeweler will do and typical costs
Common repairs:
- Re-tipping: Adding new metal to the worn prong tip and reshaping it. Typical cost: about $20–$50 per prong for gold. Platinum is more expensive, often $30–$75 per prong. Total depends on number of prongs and shop rates.
- Rebuilding: If the prong is very thin or cracked, the jeweler will build it up or replace the prong. Expect $80–$300 depending on complexity and metal.
- Replacing the head: For antique or damaged settings, a new head or basket may be required. Costs commonly run $200–$600 or more for custom work.
- Insurance and documentation: Keep receipts and photos. For high-value stones, consider appraisals and written repair reports for insurance.
Maintenance routine and best practices
- Do the Toothpick Test every 2–4 weeks for daily-wear rings. Do it before travel, heavy work, or sports.
- Professional check every 6–12 months. A jeweler will catch what you can’t — micro-cracks, stress lines, or substrate issues from soldering.
- Remove rings for tasks: Gardening, heavy lifting, contact sports, and chemical cleaning accelerate wear. Remove the ring or wear a simple guard.
- Choose prong style and metal for lifestyle: For an active lifestyle, a 6-prong or bezel setting in platinum offers more security. For a very large center stone (1.0 ct+), ask about thicker prongs (1.2–1.6 mm) or partial bezels.
Limitations of the Toothpick Test
The Toothpick Test is a quick, effective at-home screen. It will not detect internal metal fatigue deep in the prong or a subtle void at the solder joint. It also cannot replace professional ultrasonic or laser inspections. Treat it as a preventive check that tells you when to bring the ring to a pro.
Regular, simple checks save money and anxiety. Use a wooden toothpick, work in good light, and act immediately if you find movement or gaps. That small habit prevents lost stones and keeps your favorite ring on your finger where it belongs.